In this tutorial, I will be guiding you through the process of adding stock from your Doloja application. Just as a form of emphasis, the UI for the Doloja store manager is the same across all platforms. This is intentional for ease of operation across different devices and platforms

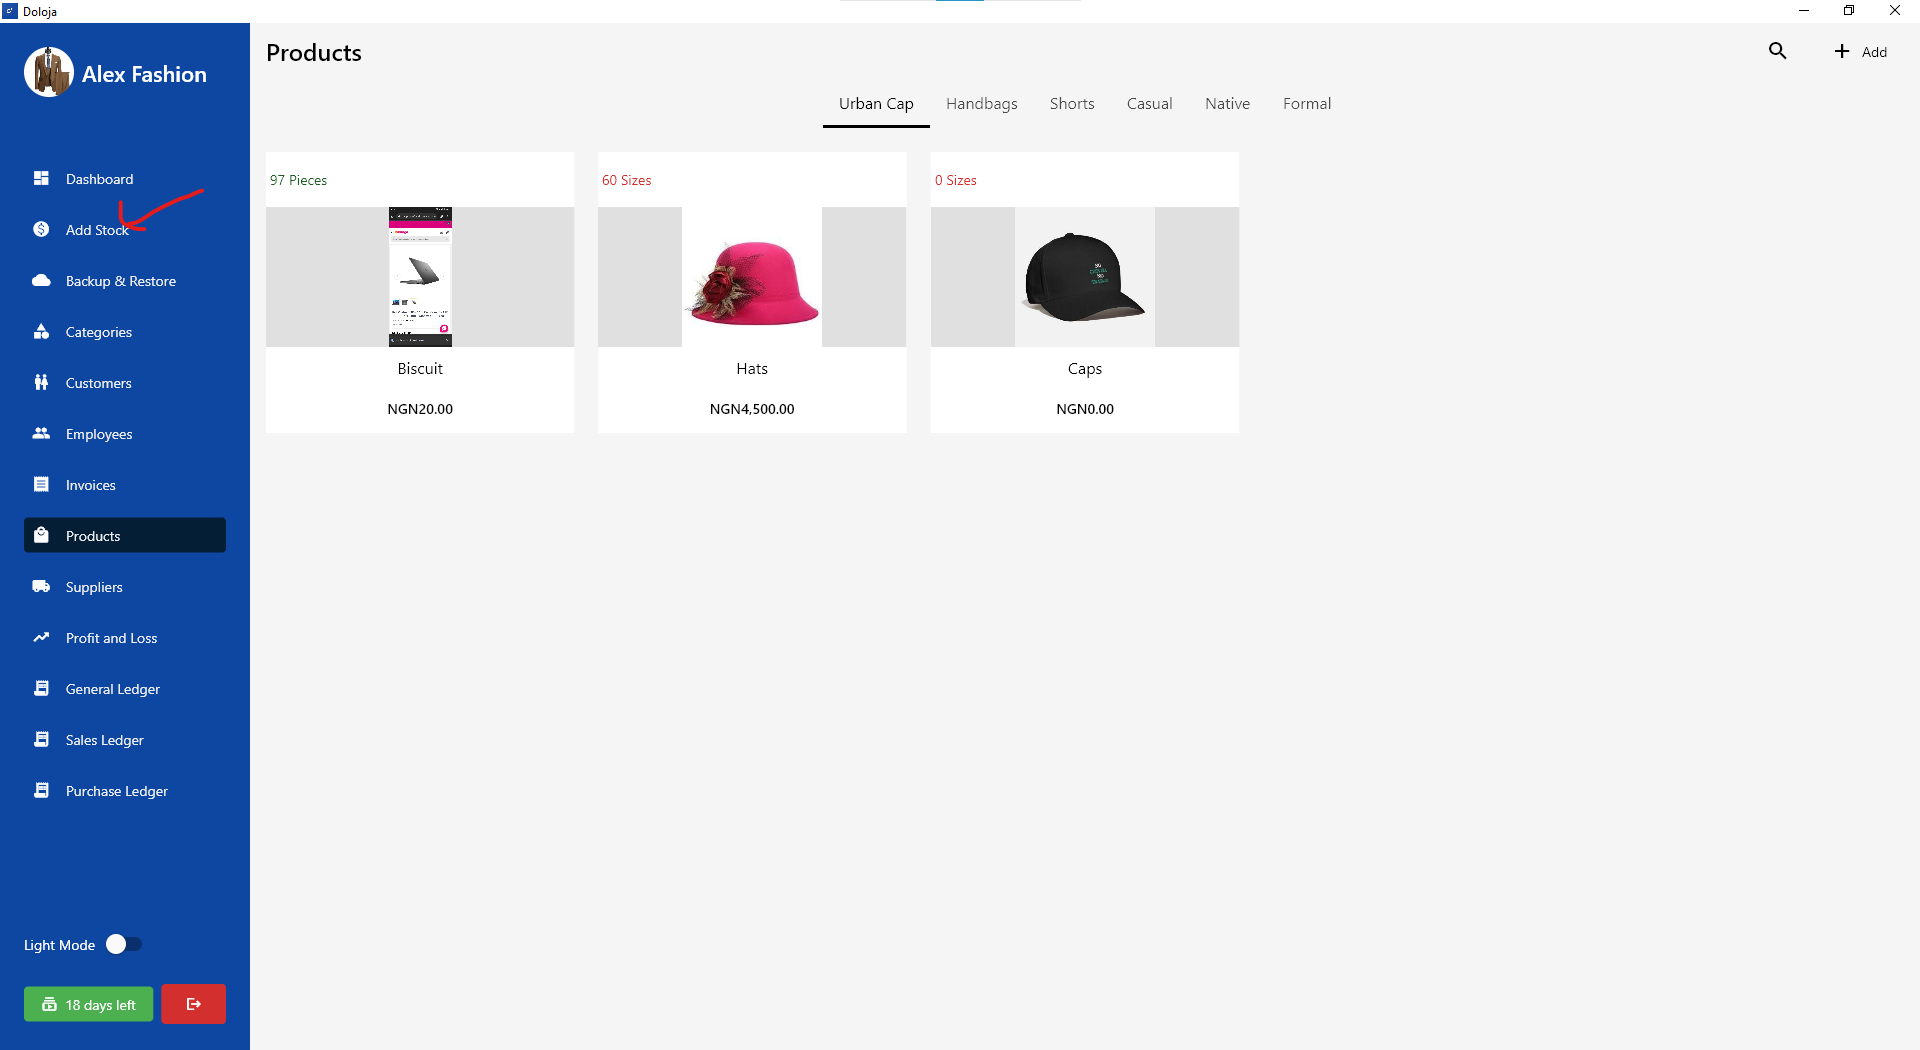
Navigate to the stock history page by clicking on the Add Stock menu as shown in the image above

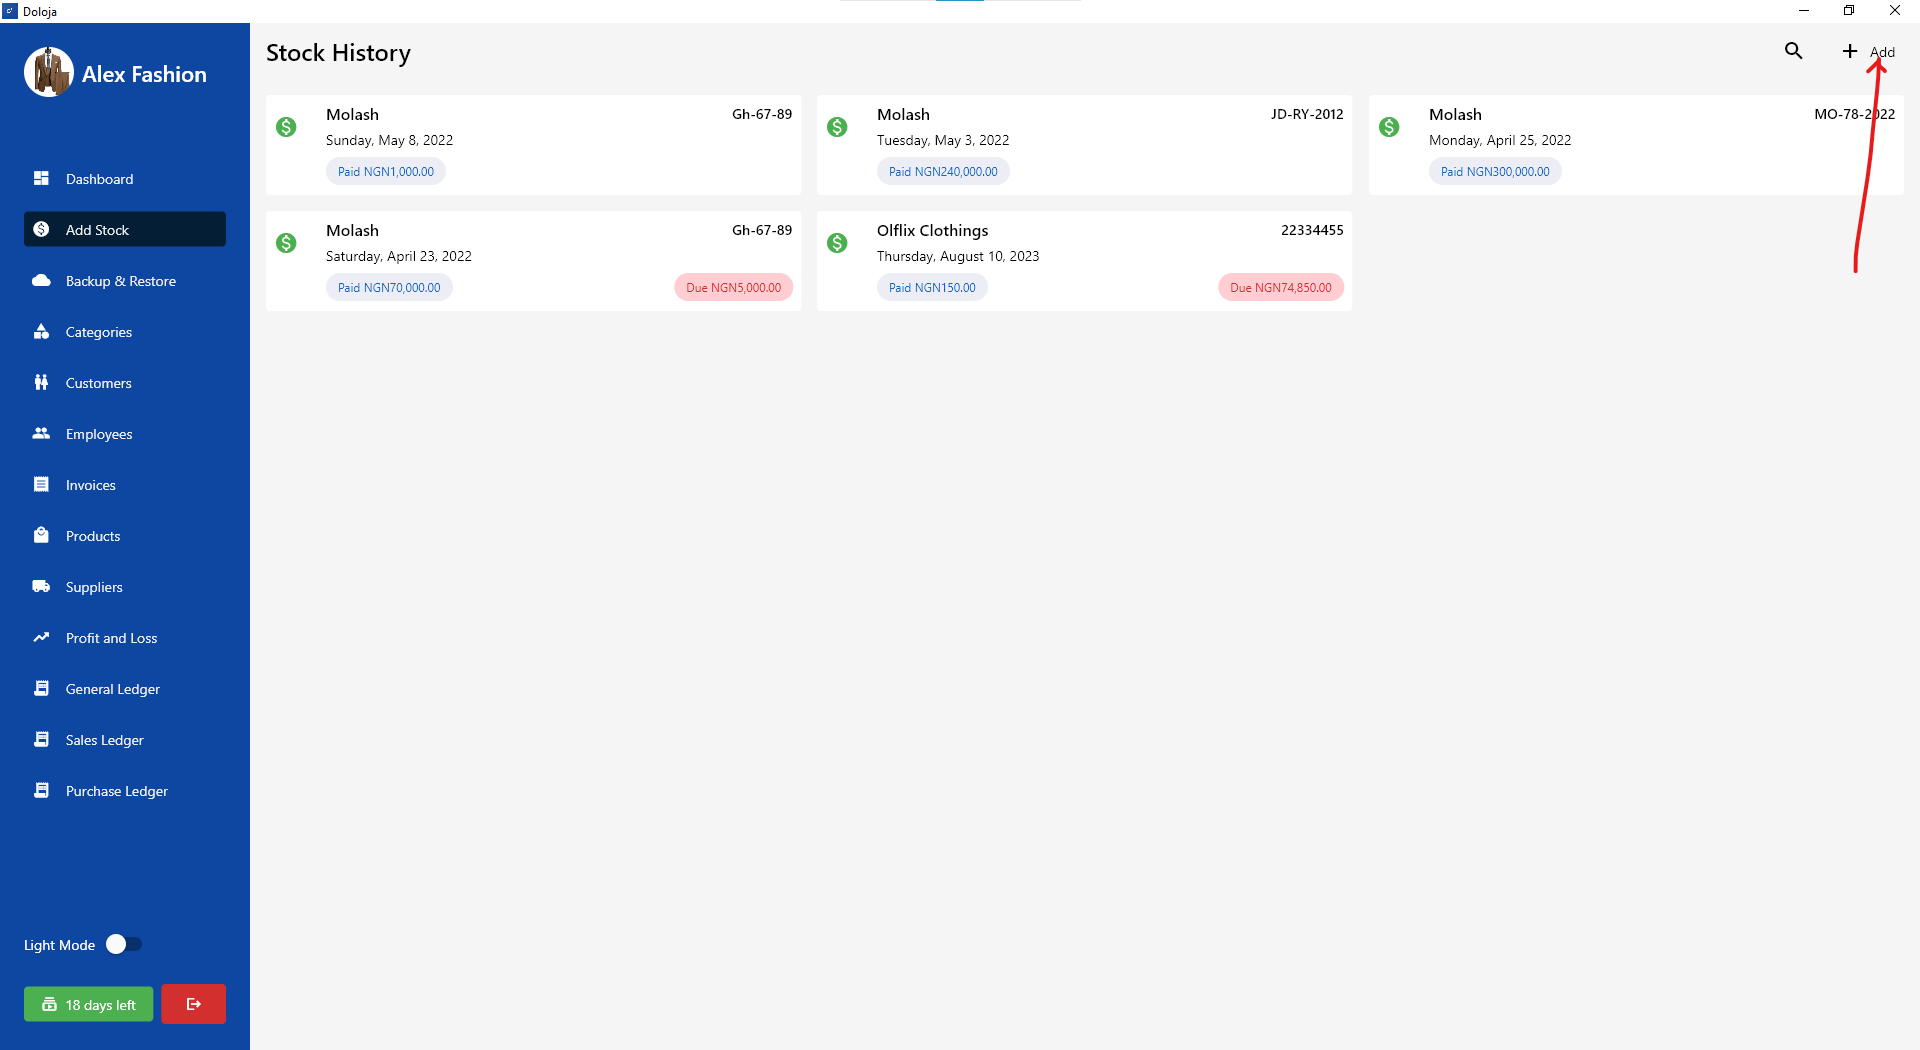
Navigate to the add stock page by clicking on the + Add button as shown in the image above

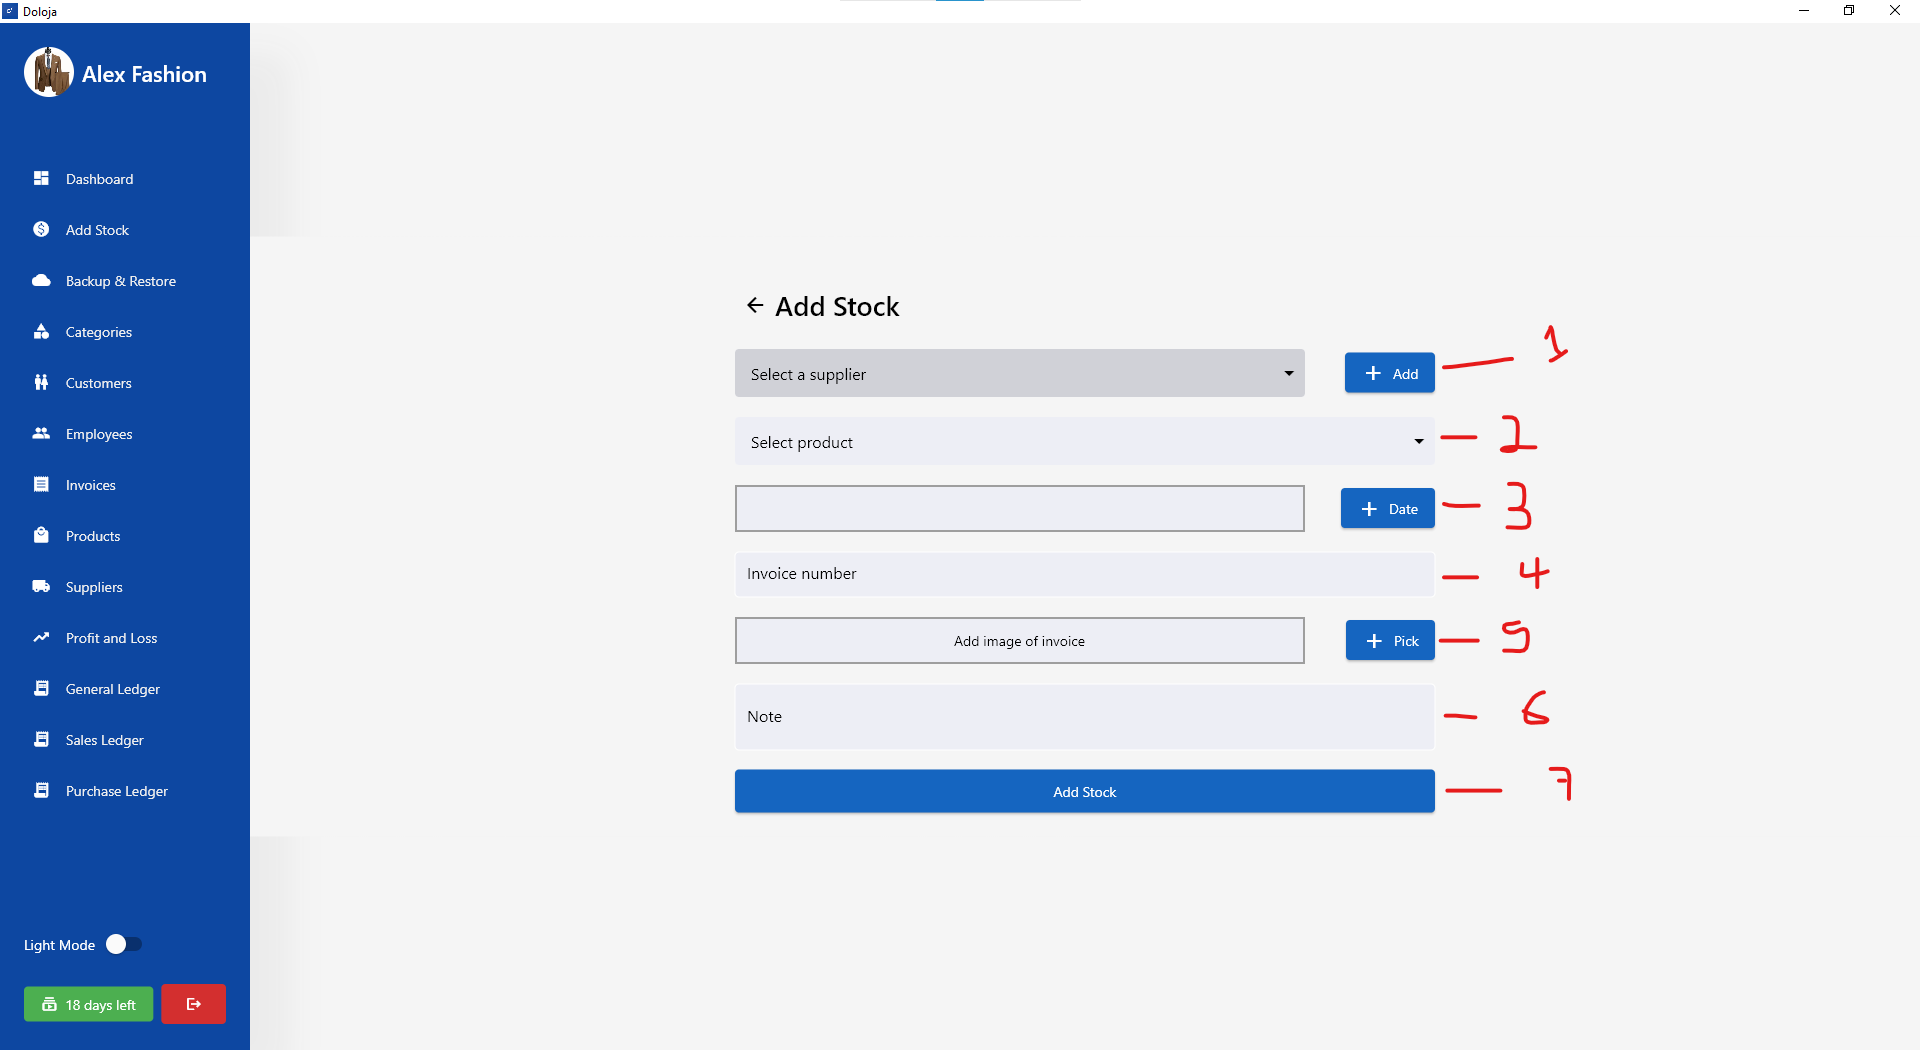
A brief explanation on what those inputs/form fields are:
Select Supplier: In this field, you need to select the supplier
you are getting/buying the product from.
If you don't have the
supplier added, you can click on the + Add button to add a
supplier or you can navigate to the supplier page by clicking on
Suppliers
Select Product: This is also a dropdown list of products you have added.
Please you need to add products to your
store before stocking it. If you have not added any product,
please click here to learn how
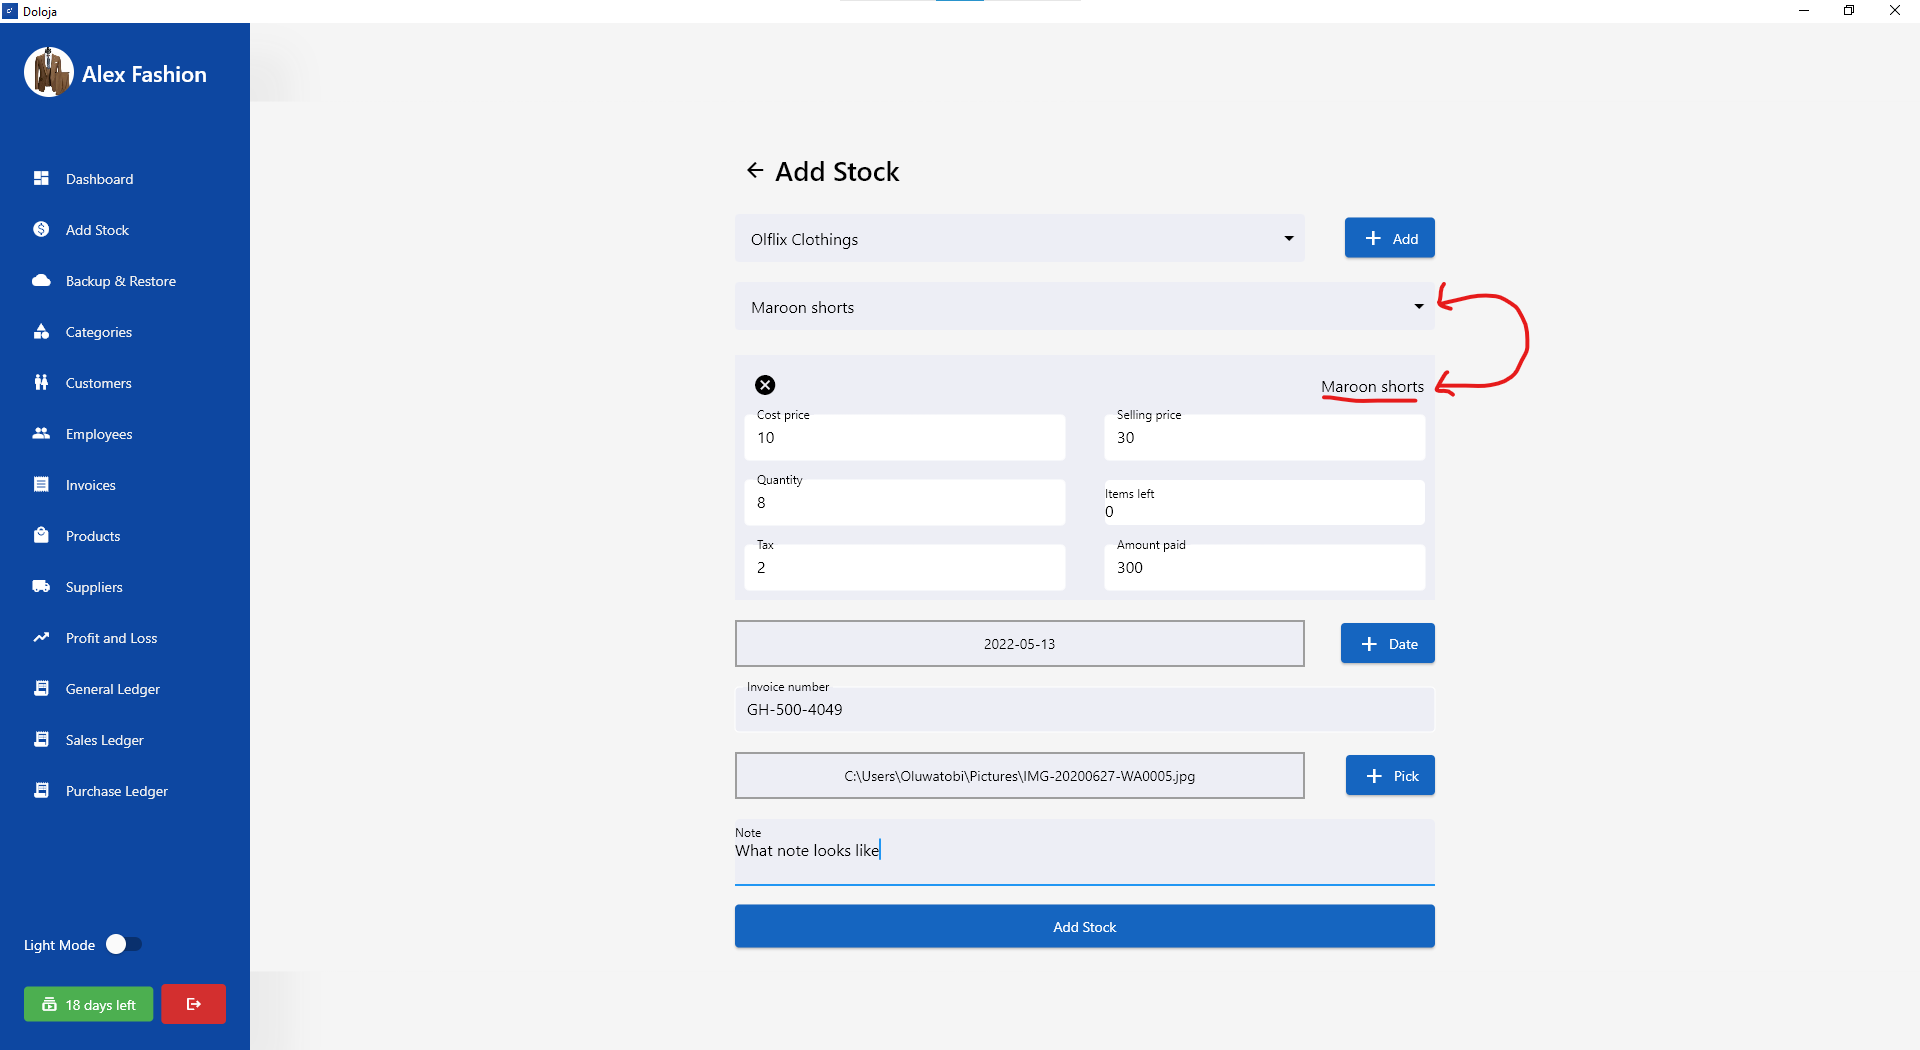
After selecting a product from the list, form will be displayed as shown in the
image below.

Date: You need to select the date you bought/stock the product. Click on the + Date button to select a date.
Invoice Number: We expect the supplier to issue you a receipt, the unique number on the receipt is what you enter as invoice number
Add an Invoice Image: Though not compulsory, we advice it. You can upload a picture of the receipt/invoice issued by the supplier for future reference
Note: Note would be for extra information you think is worthy of saving. This is not required
After filling those fields, click on the Add Stock button to submit. Immediately after submission, you will be redirected to the Stock History page
In this tutorial, I will be guiding you through the process of adding products...