How to Add Product
This guide shows you how to create products in Doloja so your inventory, online store, and reporting stay perfectly in sync across web, mobile, and desktop.
Step 1: Navigate to product page
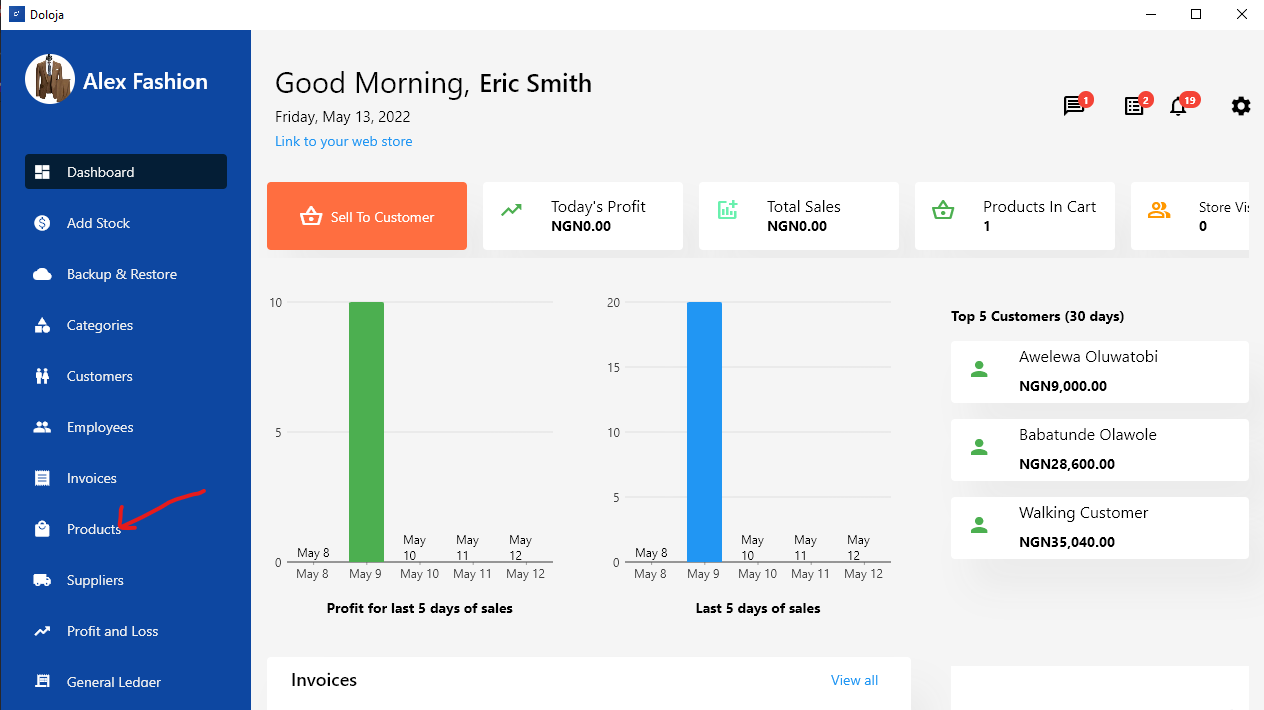
Navigate to the product page by clicking on the Product menu as shown in the image above
Step 2: Navigate to add product page
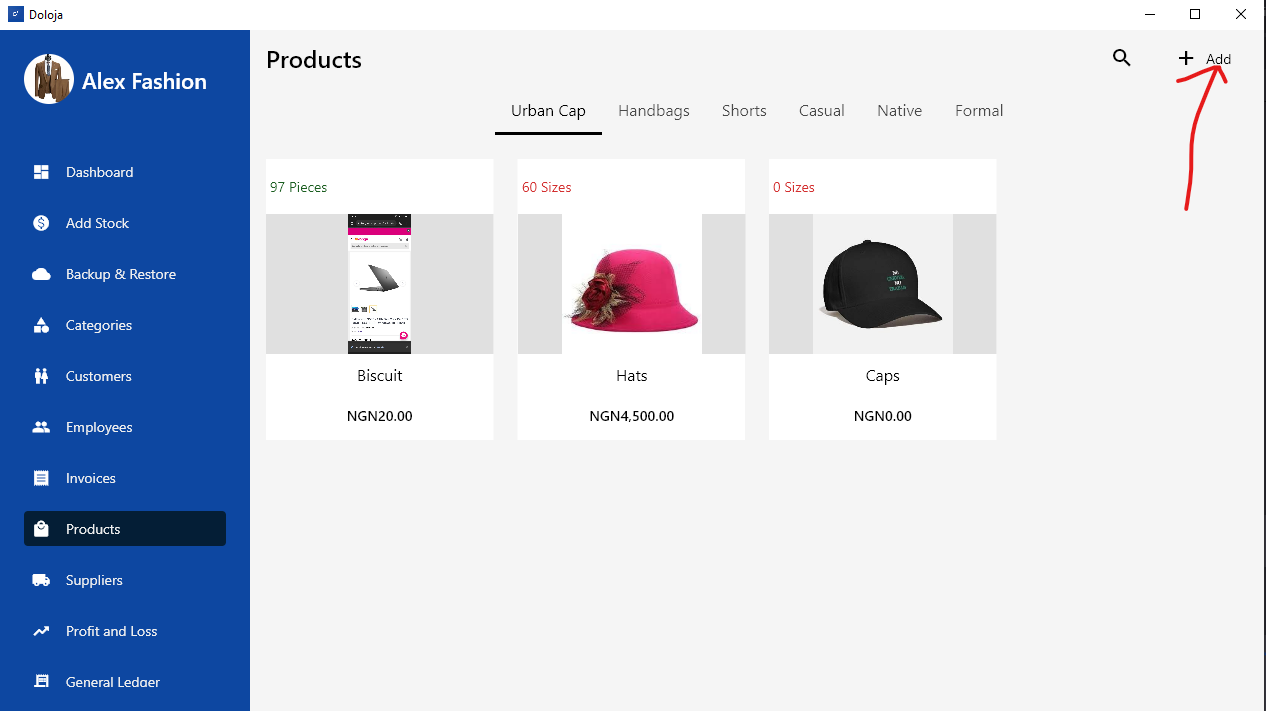
Navigate to the add product page by clicking on the + Add button as shown in the image above
Step 3: Enter your product details
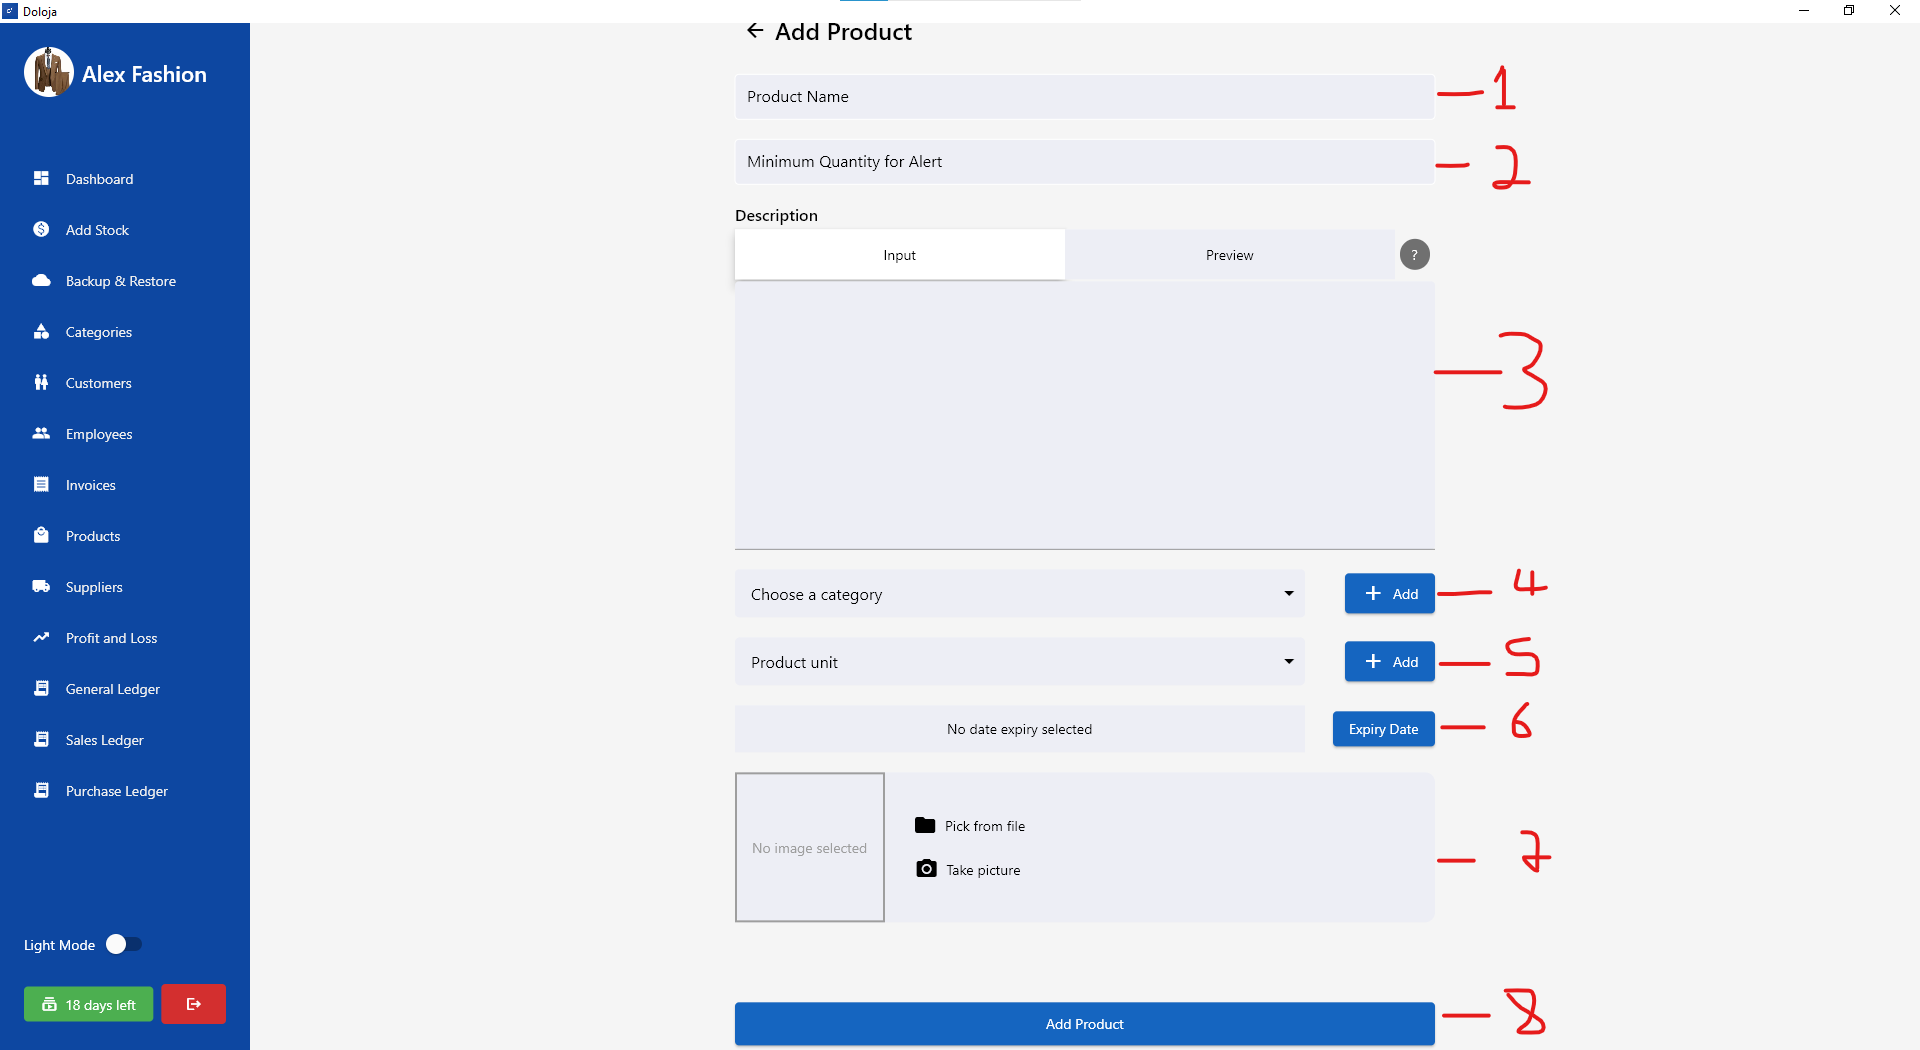
A brief explanation on what those inputs/form fields are:
-
Product Name: In this field, you enter the name of product you want to sell
-
Minimum Quantity for Alert: There are times you are not aware of quantities left of a product until there's none left. To prevent that, you set/add a number indicating the minimum quantity you want Doloja to notify/alert you as soon as it gets to that set/added number
-
Description: You add product description. If you know how to use markdowns, you can use it to format your descriptions but it is not compulsory. You can see how markdowns are used if you click on the question mark ? icon
-
Category: Every product belongs to at least a category, with this field/dropdown, you select a category the product belongs to.
To add a category, you can click on the + Add button or from the category page. After addition, you select the added category from the dropdown -
Product unit: This is the unit the product is described as e.g piece, inch, meter.
You can add yours by clicking the + Add button -
Expiry Date: This set the expiration date of the product. If the product does not expire, you can set an extremely long expiration date
-
Images: You add images of product here
Step 4: Submission
After filling those fields, click on the Add Product button to submit. Immediately after submission, you will be redirected to the product page
Step 5: Add Stock
For tutorial on how to add stock, click here